Have you ever gone through the nightmare of losing critical documents or precious photographs due to a hard drive failure? Did you know that only 80% of hard drives last longer than four years? Don’t take the risk of storing your files on a single device! In this tutorial, I will show you how to use Allway Sync to keep your important files safe.
Contents
WHAT IS ALLWAY SYNC?
Many backup programs will copy the entire contents of your computer each time you run a backup. Allway Sync is an application that works more efficiently to keep your files synchronized to a backup device. Instead of copying every single file, Allway Sync analyzes the source and destination. It determines which files have changed since the last backup, and copies only those.
For example, let’s say that you created a backup of your My Pictures folder last week. Since then, you have added 20 new photos and edited five existing ones. Allway Sync will only copy the twenty new photos, plus the five you edited, to the backup drive. This reduces the time it takes to backup, and saves computer resources.
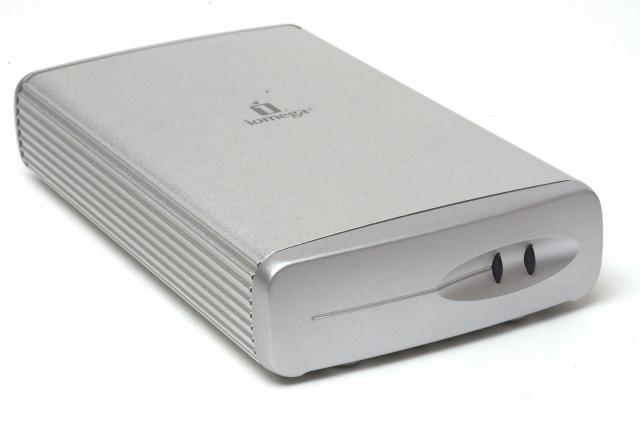
Allway Sync can keep your files synchronized to any number of devices including internal hard drives, network drives, USB thumb sticks, etc. In this tutorial I will focus on the most common type of backup device, the external hard drive.
DOWNLOAD AND INSTALL
Visit Allway Sync’s website and click on the Download button. Save the file to your Desktop and open it to begin the installation process. Follow the installation instructions. The defaults are usually acceptable.
After installation, there’ll be a new icon for Allway Sync on your desktop. Double-click that icon to open the program.
RENAME THE DEFAULT JOB
The first thing you should do is rename the default job name to something more meaningful.
In Allway Sync, a job is a set of two folders that you want to keep synchornized. The first folder is the source folder, which is typically on your hard drive. The destination folder is on your backup drive. Below is an example of a job named “Documents”, with a source folder of D:\Documents:
Right-click on the default job name, select “Rename Job”, and give the job a descriptive name. In this case, we’ll call the job “Documents” because we’ll be backing up the “My Documents” folder.
SELECT THE SOURCE FOLDER
The source folder contains the files that you want to backup.
On the left half of the program, click the “Browse” button and navigate to the source folder. In this case, we’ll use the “Documents” folder on the ‘D’ drive.
SELECT THE DESTINATION FOLDER
The destination folder is where you want to backup the files.
On the right half of the program, click “Browse” and navigate to the destination folder. In this case, we’ll use the “Documents” folder on the external drive, ‘F’. If a folder doesn’t yet exist, you’ll have to create one.
FIRST BACKUP
ANALYZE
Click the “Analyze” button. Allway Sync will find the differences between the source and destination folder.
If you’ve just created the destination folder on the external device, you will get a warning from Allway Sync that there are “substancial differences” between the two folders. You can ignore that warning because we know the two folders are completely different at this point.
SYNCHRONIZE
Click the “Synchronize” button to start copying files to the backup drive. You will notice a progress bar moving as the files are copied. Below the progress bar, you’ll see a growing list of the files being copied.
Once the progress bar has reached 100%, you are finished! Your files have been copied to the backup drive.
FUTURE BACKUPS
You should make a habit of running Allway Sync at regular intervals. Depending on how critical your data is, you may want to backup once every day, week, or month.
Let’s say a week passes and you’ve created some new documents and modified some others. This is critical work and you want to back it up.
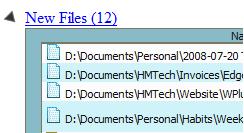
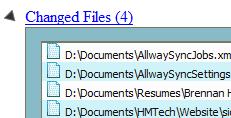
Open Allway Sync and click the “Analyze” button to see what changes will be made. In this example, Allway Sync has detected that there are twelve new files and four changed files:
Click the “Synchronize” button. Allway Sync will copy over the twelve new files and overwrite the four changed files on the external backup device. Since these are small documents, the process takes much less time than the first backup. After the progress bar reaches 100%, you will see “Synchronization Finished” in the log at the bottom. At that point, you can close Allway Sync and continue with your work.
SYNC DIRECTION
You shouldn’t alter or add files to your backup device. Instead, it should be used as a location where new and modified files can be copied to.
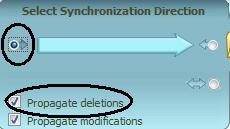
By default, any changes you make to files on your hard drive are synchronized to the backup drive, but this also works in reverse. If you accidentally modify a file on the backup drive, it will be copied to your hard drive. Usually we want the synchronization to work one way. This can be done by changing the sync direction.
Change the sync direction by clicking on the “Change” link between the two arrows:
Select the right arrow so that only changes made on your hard drive will be replicated to the backup device.
Now if a file is modified or created on the backup drive, it will not be replicated to your hard drive. Instead, any changes made to the backup device will be overwritten by the contents of your hard drive.
DELETED FILES
If you delete a file on your computer, you may want to have that same file deleted from your backup drive as well. This will ensure the backup drive remains an exact replica of your hard drive. To configure Allway Sync to do this, check the “Propagate deletions” settings (see above screenshot).
What about the danger of accidentally deleting lots of files and syncing those deletions to the backup drive? If you try to synchronize after deleting a large number of files, Allway Sync would warn you of “substantial differences” between the two folders. You would have to press a “continue” button to proceed. You must pay attention to the warnings that Allway Sync gives you before you continue with synchronization.
CREATING ADDITIONAL JOBS
So far we’ve only covered the use of a single job. Typically, you’ll have several folders on your hard drive that you want to backup. Let’s say you want to backup another folder called “Pictures”. To do this, we have to create another job.
Click “Job” on the toolbar and then select “Add New Job” (or press Ctrl + N).
Right click on the new “New Job 1” tab and select “rename” from the menu. Give the job a descriptive name.
Click “Browse” on the left side and navigate to the source folder where your pictures are stored. Then create a folder on the backup drive that will hold the backup of your pictures. Click “Browse” and navigate to the folder you created. Follow the “First Backup” step above to synchronize your pictures to the backup drive.
You now have two jobs, one for your documents and one for your pictures. Note that when you click “Synchronize” it only synchronizes the current job you have selected. If you want to backup both your pictures and documents, you’ll have to select each job individually and click “Synchronize”.
CONCLUSION
Hard drives are often the first device to fail in a computer, so it’s crucial to maintain an up to date backup. I hope you now feel more confident about getting your files onto a backup drive. For more information, check out the FAQ at Allway Sync’s website.


Pingback: Windows XP Boot Loop – Panic! [Troubleshooting] | bhm.world
Pingback: Windows XP Boot Loop – Panic! [Troubleshooting] |