Would you like to fly through downtown New York or explore the Grand Canyon? Do you want to see pictures and videos of your next vacation destination? Well, you can do that and more with the latest version of Google Earth.
Google Earth displays a 3D model of the Earth that you can rotate with your mouse and zoom in on. You can use it to explore cities, mountain ranges, deserts, oceans, and more! It can be downloaded for free from the link below:
http://earth.google.com/intl/en/download-earth.html
NOTE: Google Earth is quite intensive on your CPU, RAM, and graphics card. To run Google Earth at optimal performance your computer should have at least 1GB of RAM and a video card with at least 64MB of RAM. If you have an older computer, I suggest you use Google Maps instead.
Simply download the Google setup file, open it, and follow the instructions to install.
Contents
How to Use Google Earth
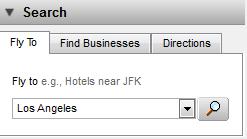
After you install and start Google Earth for the first time, type your city into the “fly to” box at the top left and sit back and watch in amazement as Google Earth zooms in on your country, province/state, and city. Once your city is in sight, you can enter your home address and “fly to” the roof of your house! To zoom in and out, use the scroll wheel on your mouse.
The satellite images seem to be a few years old because I’ve noticed several buildings under construction that were completed years ago. You will also find that certain areas are much clearer that others. Most major cities have high resolution images as well as 3D buildings that you can fly through. However, smaller towns and rural areas may seem blurry when you zoom in due to the low resolution of the imagery.
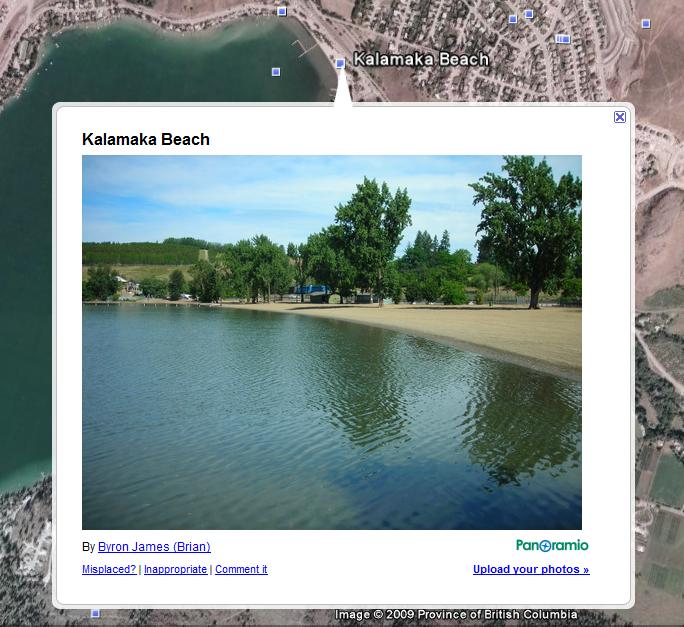
When you zoom in on a popular area of Google Earth you will notice several blue squares, all of which represent an image of the area. These images have been uploaded to Google Earth by Internet users. If you want to learn how to upload your own photos to Google Earth, there are instructions later in this article. Click on a blue square to display an image in Google Earth:

Blue squares represent images that you can click on
If you want to see videos of a certain area, click the plus sign beside “Gallery” in the Layers box. Scroll down to the YouTube option and put a check mark beside it. Now when you zoom in, you will see videos that were shot in that area. Simply click on the “YouTube” icon and watch them from within Google Earth!
You will notice a difference in performance depending on the power of your computer. For instance, I have a Dell desktop with 2GB of RAM and a PCI Express 128MB video card that Google Earth performs quite well on it. However, my laptop has 1GB of memory and an integrated video card, so the performance isn’t as good (more choppiness when zooming in), but still usable.
If you are using an older computer, you should consider using the Google Maps service which allows you to view a map and satellite images of the world from your web browser. It’s much less resource intensive, but not quite as fun!
How to Upload Your Photos
Would you like to turn your own photos into little blue squares on Google Earth for everyone else to see? Here’s how you do it:
1. First of all, create an account at Panoramio. Panoramio is a service provided by Google that allows you to upload your photos, title them, and map them to Google Earth!
2. From Panoramio’s main site, click the “Upload your Photos” button.
3. Click the “Browse” button and locate the photo you want to upload. At this point you can title the image and click on “Map This Photo” to placemark it on Google Earth.

Panoramio’s Upload Web Interface
Now you should see your photo uploaded under your account. If you click on it, you should see text below it that says “This photo has not yet been reviewed”. It must be approved before it is uploaded to Google Earth. I uploaded some pictures about two weeks ago and they still haven’t been reviewed, so it may take some time.
For details on Panoramio’s policy on uploaded photos click here.
How to View the Equator
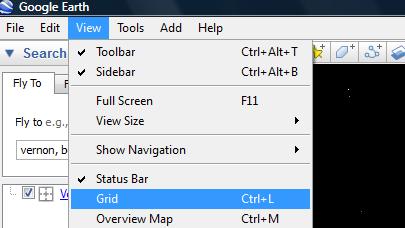
To see the equator and other lines of latitude and longitude, on the menu bar click “View” and select “Grid”:

How to Enter Full Screen Mode
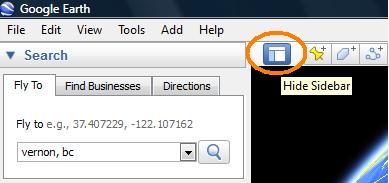
To hide the sidebar and have Google Earth take up more screen space, click the “Hide Sidebar” button just below the menu bar:

Press F11 on your keyboard to make Google Earth take up even more screenspace. You can Exit full-screen mode by pressing F11 again. To make the sidebar reappear, just click the same button you did before to make it disappear.
Conclusion
Google never ceases to amaze me with all the quality free software and services they offer. Google Earth has been around for a few years now and I continue to be impressed by the new features they add to it. So long as they do not become corrupt, I say “Power to Google!”


