In this post I will explain some basic and advanced methods of removing malware from a Windows based PC. Sometimes malware can be removed easily by simply scanning your computer with a malware detection program and removing any infected items it finds. However, sometimes malware cannot be fully removed by simply scanning with your average anti-spyware or anti-virus program. Sometimes it buries itself deep within the operating system and uses advanced methods to hide itself from anti-virus programs. If that’s the case, then you need to use special tools to analyze your computer and remove these hidden critters. This article will first show you how to remove “easy” malware and then point you in the direction for getting rid of “difficult” or persistent malware.
Contents
Basic Malware Removal
Visit Malwarebytes and download the free version of their anti-malware program.
Malwarebytes has a very good reputation for removing common malware. It’s especially good at removing the Antivirus 2009 variants.
Download the program, install it, and make sure you update it with the latest definitions before running a scan:
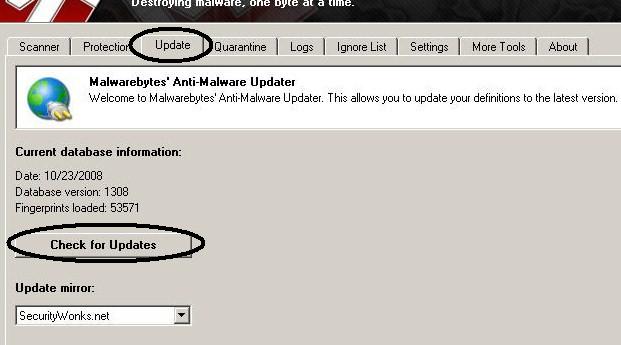
Update Malwarebytes before scanning
Updating the definitions makes it possible for Malwarebytes to detect the most recent malware.
After the update has finished, click on the scanner tab and run a quick scan:
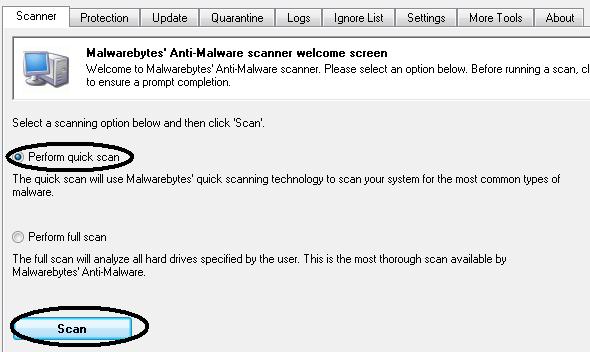
Malwarebytes will scan the Windows registry as well as some directories where Malware is typically found. After the scan has completed, a popup will tell you whether or not infected items were detected. Click the “Remove All” button to remove any items that Malwarebytes found. You may have to restart your computer for the process to complete.
That may be all you have to do to remove Malware from your system. However, if you still experience symptoms such as popups or slow downs, continue reading.
Advanced Malware Removal
Before I get into my own explanation of advanced malware removal, check out this video of Mark Russinovich of Microsoft discussing in-depth malware removal. You will need to install Microsoft’s Silverlight to view the video.
A great resource for additional help with malware removal is www.techsupportforum.com. The folks here will do their best to assist you in removing hidden and difficult to remove spyware from your system. And amazingly, they do it all for free. From their main site, click the link titled “Virus/Trojan/Spyware” help:

*** Note: The Tech Support Forum is a great resource for any computer question/problem you may have. From their main page you can enter into several forums that discuss a wide range of computing topics.
You will now enter into the “Virus/Trojan/Spyware Help” forum. Take a moment to browse through some recent postings (threads) to familiarize yourself with the posting process.
You can create your own thread in this forum to ask for help yourself. In order to post a new thread to the forum, you must register for an account. Before you post, make sure you read the “sticky thread” titled “NEW INSTRUCTIONS – Read This Before Posting For Malware Removal Help“. It will explain the process of malware removal and provide links to two tools they use to get an initial analysis of your system.
The rest of this article discusses the technical details of how to analyze these logs. If you are at all interested, feel free to continue reading. Otherwise, all the best with your malware removal.
Malware Removal Technical Details
Below is what I have learned from using these tools to detect malware. It’s not complete yet. I plan to add more information here as I learn more.
The two tools the Tech Support Forum will have you run are called dds.scr and GMER
dds.scr – DDS will analyze your system and generate two logs, DDS.txt and attach.txt
GMER – GMER will scan your computer for hidden files, services and registry entries. It will notify you of possible rootkits.
dds.scr
When you open DDS.scr, and DOS shell window will popup and stay on the screen for a short period of time:
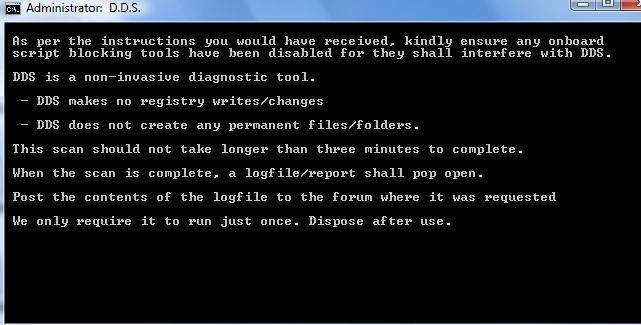
DDS analyzing your system
Allow the script to complete it’s process. When it’s finished, two notepad windows will popup. One called DDS.txt and one called Attach.txt. The Attach.txt is of less significance than the DDS.txt file and is only required if suspicious information is found in the other logs. Let’s examine the DDS.txt file and see what’s inside:
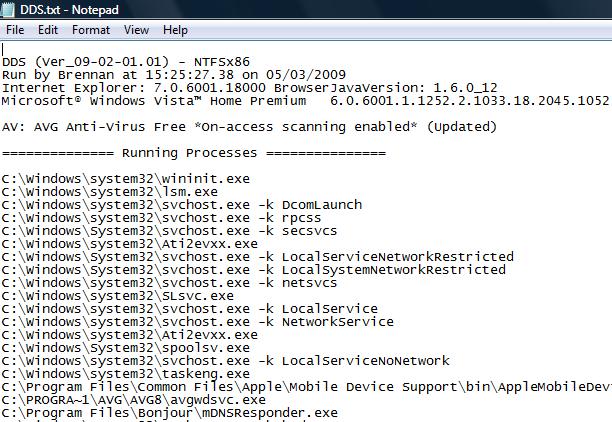
At the top of the log file you can see that DDS has generated some basic information about the system such as file system type, processor type, operating system version, web browser, and whether or not your anti-virus real-time scanning is active. Below that is a list of running processes.
Depending on your level of experience, you may or may not recognize any of the processes in the list. After you have examined several of these logs, you become familiar with common processes. A trained eye can spot a process that looks suspicious. If you are unsure what a particular process may be, copy and paste it into Google for further details:

Google will find further information on any unknown process
Beneath the running process, DDS will have generated a “Pseudo HJT Report”. HJT is short for HijackThis, a program owned by TrendMicro that detects browser hijacks and other suspicious system alterations caused by malware.

Psuedo HijackThis Report
Keep an eye out for suspicious Browser Helper Objects (BHOs). Sometimes malware will attach itself to Internet Explorer (and explorer.exe) as a BHO and then hide itself from the system. In the screenshot above, you will see several legitimate BHOs such as Acrobat Reader, Google Toolbar, McAfee SiteAdvisor, and Java. Again, if you’re not familiar with the .dll file listed beside the BHO, type it into Google to get more information.
Also listed in the HJT report are programs that start automatically when you turn on the computer. The programs that start automatically will be listed beside uRun=, mRun=, and StartupFolder=. Again, Google can help you find more information about any startup process you are unfamiliar with.
Startup processes can be enabled from the msconfig utility or by using the Autoruns utility from Microsoft.
Below the “Pseudo HJT Report” is further information on services or drivers that are installed and a list of files created in the last thirty days. All of this can be used to help identify malware recently installed on your system.
If you Google a filename and discover that it could be malicious, use VirusTotal to scan the file. VirusTotal is a free service which allows you to upload a file and have it scanned by multiple online anti-virus scanners:
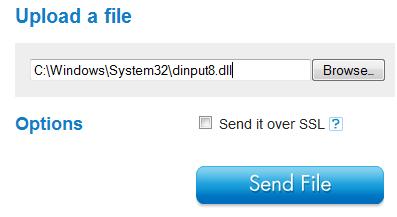
www.VirusTotal.com – Scan a file with multiple AVs
GMER
GMER is a little utility that will scan for evidence of a rootkit on your system. A rootkit is malware that uses advanced methods to hide itself from Windows and your anti-virus program. Often, GMER can uncover rootkits and show you hidden files, services, and registry entries.
When you run GMER, it will automatically scan your system for evidence of a rootkit. If it finds that evidence you will see the following message:

GMER Detects Possible Rootkit Activity
If this is the case, you will definitely want to post your logs to the Tech Support Forum for further analysis.
To continue scanning with GMER, uncheck the “IAT/EAT” and “Sections” options (you don’t need that information) and click the scan button. GMER will then scan your computer for hidden files, services, registry entries, etc. that MAY have been hidden by malware.
If GMER uncovers a file or service that looks suspicious, enter the filename into Google and see what the results are. You can also use VirusTotal to scan the file for viruses.