Are you worried about the implications of providing your EOS account keys to third-parties? The more organisations you share your keys with, the greater the risk that your account will be compromised. This is especially worrisome if you are using an EOS genesis account, where both the original owner and active key are the same. In this post, I will cover the difference between an owner and active key, and outline the steps to change either key using the Greymass desktop wallet.
Contents
Owner Vs Active Key
Every EOS account is created with both an owner and active key, with each providing a different level of access to the account.
The owner key gives the holder complete access, and can be used to perform actions like changing the owner key itself. If this key is stolen, the attacker can easily take possession of the account and all of its assets.
The active key is more restricted and can only be used to authorise transactions, such as transfer tokens and vote for block producers. If this key is stolen, you can take steps to protect your ass(ets).
Applications that interact with the EOS blockchain on your behalf (Scatter, Greymass, etc.) should usually only have access to your active key. Although I believe the developers of these applications are trustworthy, code is never perfect, so you should restrict their access to your account as much as possible.
In some cases you may need to provide your owner key to a trusted third-party application, such as when you want to change the owner key itself. However, this level of access should only be provided temporarily until you’ve done what you need to do, and then quickly revoked.
If you have a genesis account (where both owner & active keys are the same) and want to access forks of the EOS mainnet snapshot, such as TELOS or Worbli, you should change the owner and active keys of your EOS account before providing your original owner key to these third-parties.
Even though these projects are trustworthy, every time you provide your private key to a third-party you increase the risk that it could be stolen via some security flaw or other vulnerability. By storing your EOS assets under a new key pair to which you keep the owner key under tight control, you minimise the risk of losses.
If your active key were to be stolen (and your tokens were staked) you would have time to recover your account. The reason being that the attacker would have to unstake your tokens and wait three days before they became transferable.
You can setup an alert at EOS Authority to notify you if your tokens are unstaked for any reason.
Modify Your Keys
Yes, this step can be a little nerve-wracking if you have valuable assets associated with your EOS account. Just make sure that you have the generated key-pairs saved (printed, written down, stored encrypted) before entering them into the wallet. So long as you have the associated private key to any public key you enter, you will not lose access to your assets.
You may want to test this on a less valuable EOS account if you’re concerned about making a life-altering mistake.
There are numerous applications with which you can change your owner and active key, but this post will demonstrate how to do it using the Greymass Desktop Wallet. It is one of the most well-maintained and well-designed EOS wallets in my opinion.
Download Greymass Desktop Wallet
Be sure you are running the latest version of the Greymass Desktop Wallet by checking their releases page on Github. If you’ve yet to install it, download and install the latest release.
Generate Fresh Key Pairs
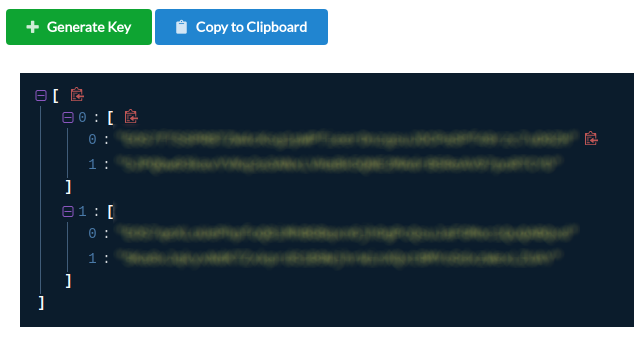
Launch the Greymass wallet and click on Tools. Find the Key Generator under Utilities.
In order to change both your owner and active keys, you’ll need to generate two new key pairs. Click the Generate Key button twice to create them. Store these keypairs somewhere safe.
Which one will be the owner key pair and which one will be the active key pair? That my friend, is entirely up to you. Just choose one or the other and label it appropriately.
You will need more frequent access to the active key, so keep it stored electronically, preferably encrypted.
As discussed earlier, the owner key is the most important, as it can be used to recover your EOS account. Depending on your risk tolerance, you could write it down and store it in a safety deposit box, or you could keep it encrypted on your computer somewhere.
We will use the key pairs you generated here in the steps below.
Change Owner Key
We will start by changing the owner key.
Click on Tools and find Permissions under the Wallet Tools section. Here is where you can actually change the owner and active key of your EOS account.
If you attempt to change the owner key while logged in under the active key, you will see the following message when you hover the mouse over the Modify button:
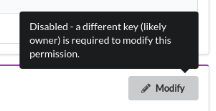
Look at the top of the wallet to verify which account you’re logged into and the level of permission:
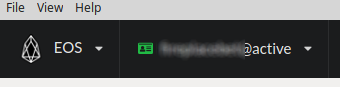
You need to be logged in as the owner of the account to change the owner key.
Click on Manage Wallets under Tools.
Click the Import Accounts button and enter the private owner key of your EOS account.
You can switch accounts by clicking on the account name as seen in the snippet above. Once logged in as the owner, you will be able to change the owner key.
Go back to the Permissions tab and click the Modify button under owner permission.
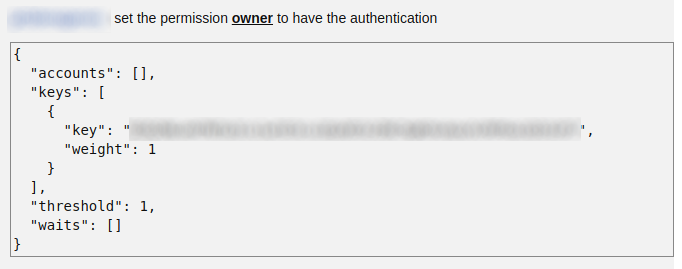
Enter the public key from one of the key pairs you generated in the previous step and click Update Permission. BE SURE YOU HAVE THE CORRESPONDING PRIVATE KEY SAFELY STORED SOMEWHERE.
You have successfully updated the owner key of your EOS account.
Change Active Key
Once the owner key has been changed, you can proceed to change the active key as well.
In the Permissions tab click the Modify button under active permission.
This time enter the public key from the second key pair that you generated and click Update Permission.
You have successfully updated the active key of your EOS account.
Verify Changes on Block Explorer
You can verify that either the active or owner key has been changed at EOS block explorer bloks.io.
Enter your account name into the search box.
Find the transactions section and click on the Account button to filter account-related events.
![]()
Under the transaction history, you should see that either the owner or active key has been changed for the account.
Delete Owner Account in Greymass
As discussed earlier, it’s good security practice to revoke owner permissions to EOS applications after you’ve done what you need to do. Now that we’ve changed our owner key, we can remove owner access from the Greymass wallet.
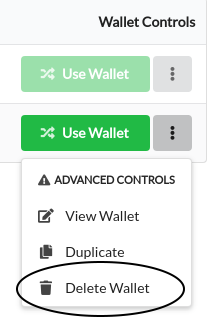
Click on Manage Wallets under Tools. From here you can delete the owner wallets that you no longer require:
For a total cleanup, click on Reset Application under Advanced Tools. This will remove all accounts and application settings. Re-launch the application and login using only your active key.