Are you looking for an easy way to organize, edit, and email your digital photographs? Google offers a free program called Picasa that can do just that for you.
Picture organization can be confusing, especially if you have multiple programs on your computer all managing your photos in different ways. Picasa can ease your picture management suffering.
I recommend Picasa to my friends and customers for the following reasons:
- Slick and fast interface
- Easy to edit, email, and upload photos to the web
This article will show you how to download, install, and use the basic features of Picasa 3.
NOTE: The screenshots, links, and program descriptions may not reflect your exact experience, as programs and websites are updated frequently.
Contents
Download
To get started using Picasa, first download the installation file from Google’s web site. Click the link below to go to Picasa’s download site:
Click the “Download Picasa 3” button:

Firefox
If you are using Firefox 3, you will be asked to save the file. Click the “Save File” button and Firefox will automatically save it to your desktop (unless you have configured it to do otherwise):
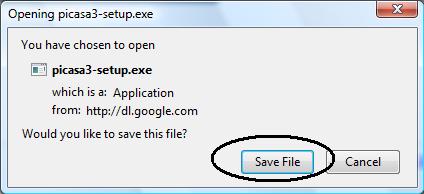
Firefox 3 Save File Dialog Box
Once the file has been saved to your desktop, double-click the icon to begin the installation and continue to “Step 2: Installation”:
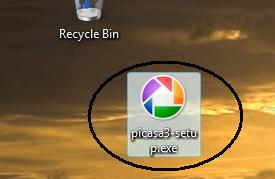
Picasa 3 Install Desktop Icon
Internet Explorer
If you are using Internet Explorer, you may see a yellow bar at the top of the page indicating that Google is trying to send you a file. Click the yellow bar and select “Download File”:
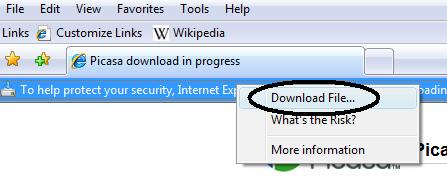
Internet Explorer 7/8 Information Bar
A File Download window will pop up. Click the “Run” button. This will automatically start the Picasa installation after the file has been downloaded:
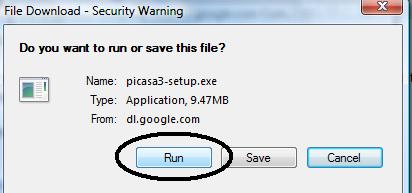
Internet Explorer File Downlod Window
Install
You may receive some security warnings as the installation continues. Allow the process to continue by clicking “Run”, “Continue”, etc.
You will be presented with a license agreement. Read through and click “I Agree” if you agree to the terms:
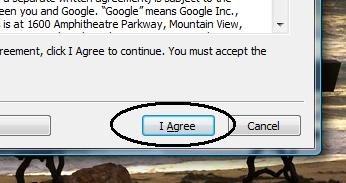
Licence Agreement with Google
Leave the destination folder as it is and click the “Install” button:
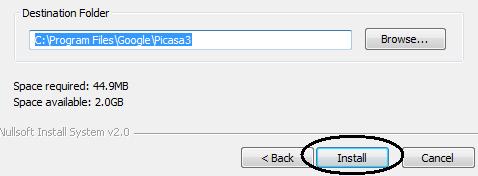
Set the destination folder where Picasa will be installed
After you click on the install button, Picasa will begin copying files to your computer. After the file copy process is complete, you will be presented with the following options:
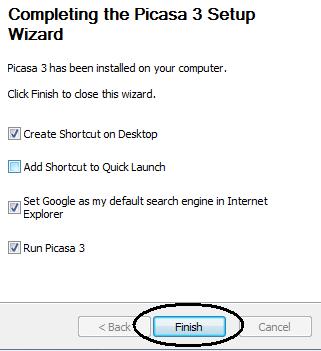
Picasa Installation Options
By default, all four options are checked off. I decided to uncheck “Add Shortcut to Quick Launch” to reduce the amount of clutter on my quick launch bar. Leave the rest of the options checked unless you have a reason to uncheck them. Click the “Finish” button to complete the installation.
Configure
Picasa has now been installed on your computer. Now it needs to be told where all your photographs are. Normally, all your photos will be stored in the “My Pictures” folder on your hard drive. When Picasa starts for the first time, it will ask to scan your computer for pictures to import. I highly recommend you select the option to “Only scan My Documents, My Pictures, and the Desktop”. If you select “Completely scan my computer for pictures”, Picasa will import EVERY picture on your hard drive, included the ones that come with Windows and other applications, creating a much larger database of pictures than you were hoping for.
The only reason you would want to scan your whole computer for pictures would be if you knew you had photos stored outside of the My Pictures folder or on an external hard drive. In that case, I would recommend that you manually tell Picasa where the other folders containing pictures are, instead of scanning your whole drive:

Tell Picasa where to import photos from
After you click “Continue”, Picasa will begin to scan your computer for pictures. You will see this process happening at the bottom right corner of Picasa, as your photos flash by. It will start populating folders on the left side of the screen with pictures. By default, it organizes the folders in chronological order, with the newest ones going to the top. The length of this discovery process depends on the number of pictures you have on your computer.
Picasa finding your photos
You will also be asked if you want to use Picasa’s Photo Viewer. If you decide to use it, whenever you double-click a photo on your computer, it will open in Picasa Photo Viewer. I prefer to use the built in Windows photo viewer so I select “Don’t use Picasa Photo Viewer”. However, it’s up to you whether or not you decide to use it:
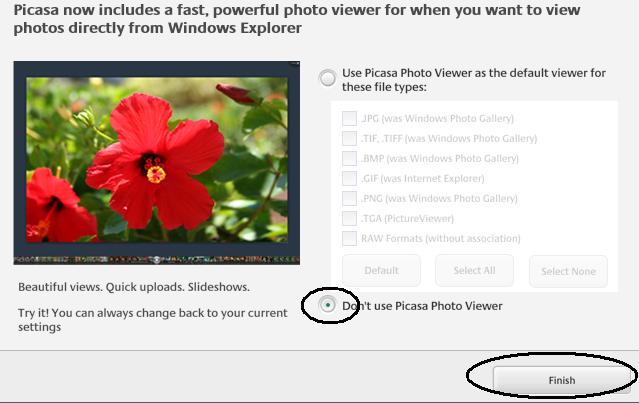
Picasa Photo Viewer Option
At this point, the configuration of Picasa is complete. We can now move on to how to use Picasa.
Use
Interface Overview
On the left is a window pane which displays all your picture folders, organized by date and separated by year. If you select a folder, Picasa will show you all the pictures contained within it. There is also a scroll bar on the right side of the window that you can use to browse through your photos. Moving the scroll wheel on your mouse up or down will accomplish the same thing. At the bottom of Picasa are buttons you can use to upload, email, and print your photos.
Uploading Pictures from your Digital Camera
To upload pictures from your digital camera, connect the USB cable from your camera to the computer and make sure the camera is turned on. Windows should automatically detect that your camera has been connected and present you with the Autoplay Window. If a different program opens, read the note below:
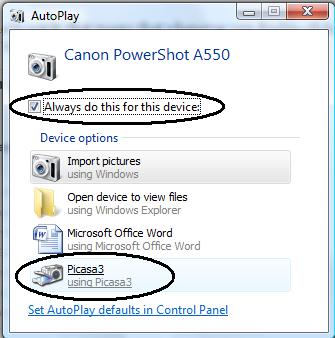
Windows Autoplay Window
The Autoplay window allows you to choose which program will download the pictures from your digital camera. Select “Always do this for this device” and click on “Picasa3”. The next time you connect your camera to the computer, Picasa will automatically start downloading photos from it.
NOTE: If a different photo management program opens when you connect your digital camera, you will have to change some settings. In Windows XP, open “My Computer”, right-click on your digital camera and select “Properties”. Click the “Events” tab and under “Actions” change the “Start this program” option to Picasa 3. In Windows Vista, go into the Control Panel and double-click the “Autoplay” icon and change the program that automatically starts when you plug in your camera to Picasa 3.
Picasa will now show you all the photos on your camera. Click on them one at a time and you will see a preview on the right side of the window where you can rotate them if you need to. If you only want to import a few images, select them while holding the “Ctrl” key on your keyboard, then click the “Import Selected” button. Otherwise, click on the “Import All” button to copy everything:
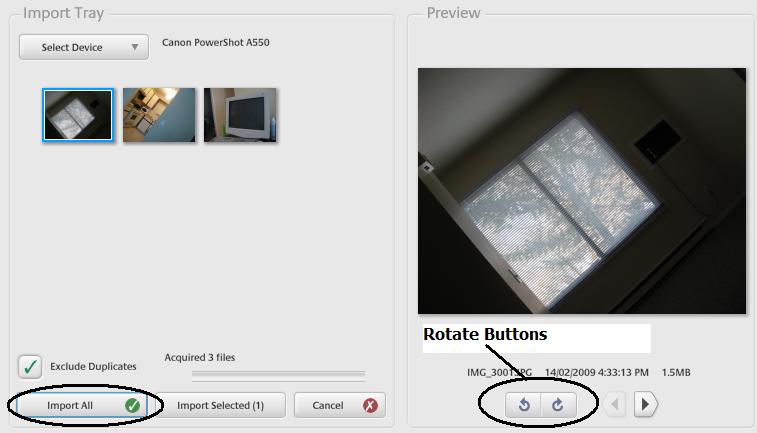
Select the pictures to import into Picasa
At this point, Picasa will ask you to create a new folder to store the pictures in. Name it something relevant to the pictures on your camera. You can also optionally type in the location the pictures were taken and give them a description. Finally, at the bottom, it will ask you what to do with the pictures on your camera after they have been copied to your computer. If you chose to import all the pictures, then you can safely select “Wipe the card”. That option will erase all the pictures from your camera after they are copied to your computer. If you chose to only upload a few specific photos, then you will probably want to select “Safe delete” so that Picasa only deletes the photos that were copied to your computer and leaves the rest alone. Click the “Finish” button once you’re done:
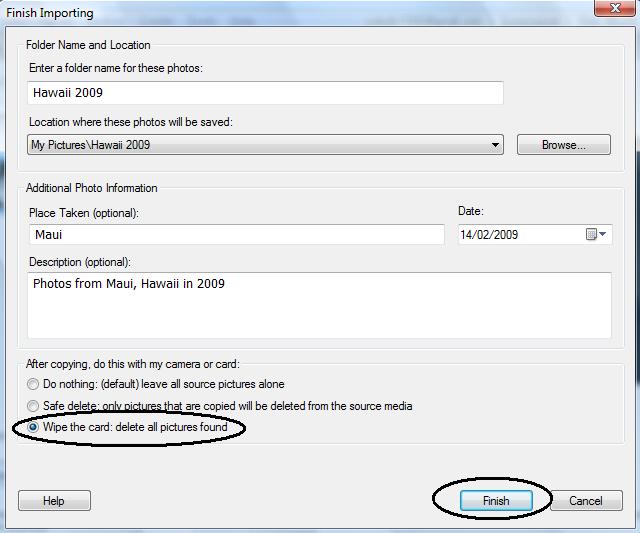
Create a folder for your imported photos
If you selected “Wipe the card”, you will be given a warning about deleting all the pictures from your camera. Say “yes” if you chose to copy everything to your computer. This way your camera memory card won’t be filled with copies of photos that have already been imported to your computer.
You will now see a new folder with the name you gave it at the top of the folder list on the left pane of Picasa:
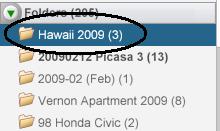
New folder in Picasa
Congratulations, you have successfully downloaded pictures from your camera into Picasa and given your digital camera a fresh start.
Emailing Photos from Picasa
NOTE: Picasa will automatically resize photos when you email them (so they aren’t huge on the receiving end). Most people prefer it this way. However, if you want to change this setting you can from Tools -> Options -> Email tab)
Select the photo you want to send or select multiple photos by holding the “Ctrl” key on your keyboard while you click on each photo. After you’ve selected the photos you want to send, click the “Email” button:
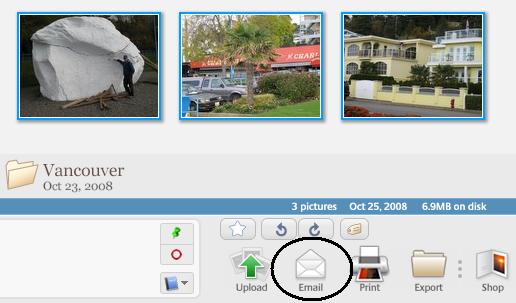
Hold the ‘Ctrl’ key to select multiple photos
Picasa will now ask if you want to send the photos via your Outlook Express / Windows Mail account or through a Gmail account. If you already have an email account setup on your computer, select your default mail program. Otherwise, select Google Mail. If you don’t have either a Windows email or Gmail account, select the “Get a free account” link and follow the instructions:
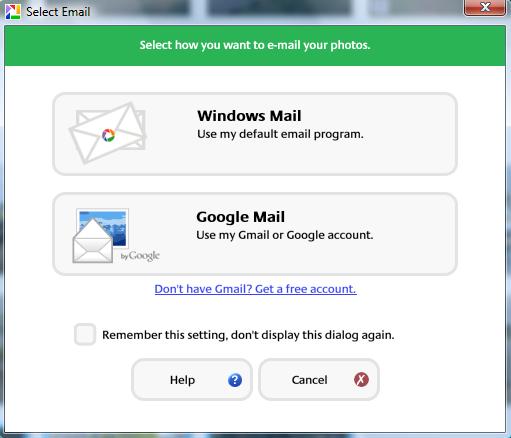
Select how to send your photos
In this case, I’ll choose Google Mail to send my photos. After clicking “Google Mail”, I can choose the recipients and customize the subject and body of the message. To send to multiple recipients, separate each email address with a comma. Once you are done editing the information, click the send button!
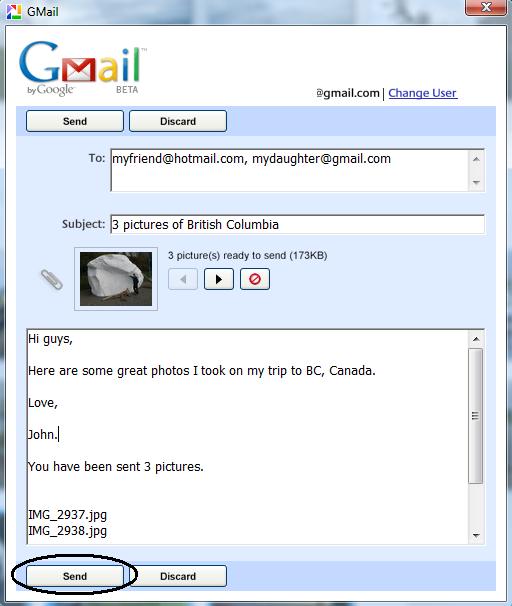
Choose the recipients of your photos
Conclusion
Picasa is a great free program for editing, organizing, and emailing your digital photos. As of right now, Picasa 3 is the latest verion. However, Google is constantly working on improving their software and there will likely be more features added in the near future.