Poor audio and video quality in Skype calls may be caused by the relays (other computers on the Skype network) that your communication traffic passes through before reaching your conversation partner. Relays add latency to your connection and can cause choppy audio and pixelated video.
This post demonstrates how to configure Skype and your home router to make direct connections to your conversation partner, bypassing relays.
Contents
Check for Relays
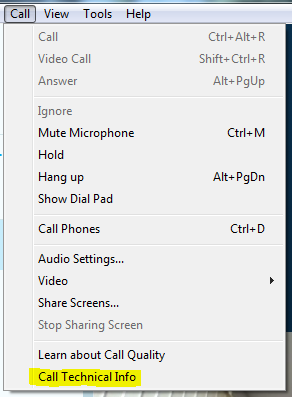
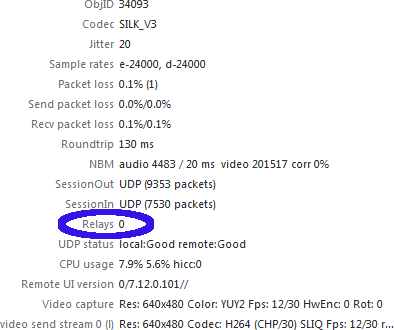
First of all, check to see if your connection is actually being relayed through the Skype network. This information can be found in the Call Technical Info.
During an active call, click on Call -> Call Technical Info
In the window that pops up, check for active relays.
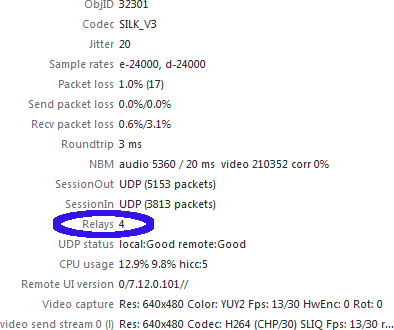
If there are zero relays, then you have a direct connection and the cause of your poor audio and video quality lies elsewhere. If there are active relays, follow the steps below to configure a direct connection.
Setup Port Forwarding
First, we need to determine what port number Skype is using for incoming connections.
Skype Settings
In Skype, click on Tools -> Options
*Note: Watch this video to see how to change Skype settings on Windows 8.
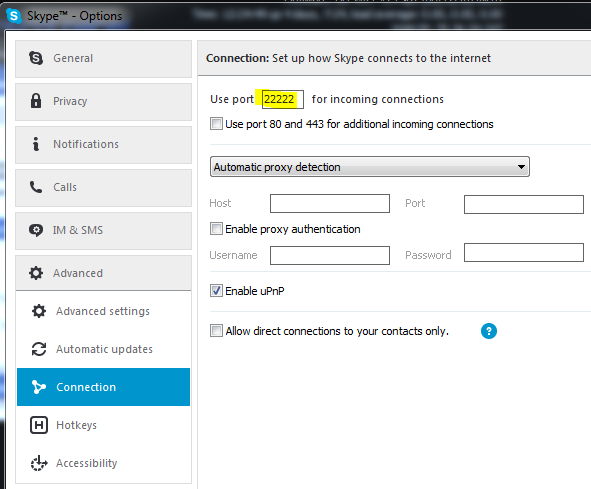
Under Advanced -> Connection you will find the port that Skype uses to listen for incoming connections. In this example, Skype is listening on port 22222. If you’re router does not have port forwarding or uPnP (Universal Plug and Play) enabled, Skype will not be able to accept connections on this port, as they will be blocked by your router.
Change the port number to something within the high range of available ports (20000 – 60000). This will make it less likely that someone scanning your public IP address will find the open port.
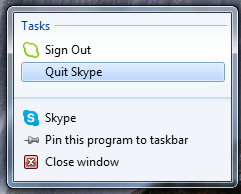
Save your new settings and exit Skype.
Right-click on it in the system tray and select Quit Skype from the menu.
Find the local IP address of computer running Skype. In Windows, this can be done by opening a command shell and typing the command ipconfig.
Router Settings
The exact steps to follow here will depend on your home router’s make and model. We will demonstrate the process with a Linksys router running the DD-WRT operating system.
Login to the router and find the Port Forwarding section.
Create an entry which includes Skype’s newly configured port number and the local IP address of computer running Skype.
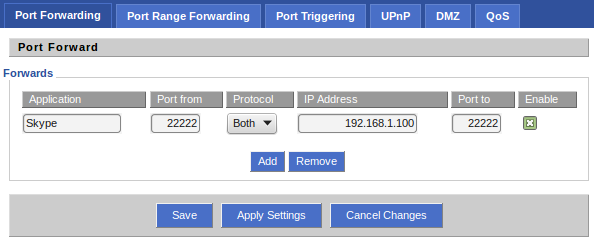
Save the settings and reboot the router to make sure the changes take affect.
Verify Direct Connection
Once you’re router has restarted and you can connect to the Internet, restart Skype and have someone call you.
Check the Call Technical Info again. The number of relays should be zero.
You now have a direct connection to your conversation partner and hopefully much better audio and video quality!