So you’ve made some awesome tweaks to your WordPress theme, but then you go ahead and update it with the latest version from the author and… All your brilliant customizations have been lost!
If you have made customizations directly to a WordPress theme, they will be wiped out whenever you install an update from the author.
You can manually make changes to the new files whenever the developer releases an update, but the best way to retain your customizations is to create a child theme.
Create a Child Theme
The first thing you need to do is create a new folder in the WordPress /theme directory. The folder name should be the theme’s name followed by a hyphen and then “child” (e.g: themename-child)
Copy and paste the following into a text editor and save it as style.css in the new folder (customizing it for your own site)
/*
 Theme Name:   CoolTheme Child
 Theme URI:    http://www.cooltheme.org/
 Description:  Child theme of CoolTheme
 Author:       John Smith
 Author URI:   http://www.jsmithdesign.com
 Template:     cooltheme
 Version:      1.0.0
*/
Create a functions.php file in the child folder and copy and paste this into it:
<?php
function enqueue_child_theme_styles() {
    wp_enqueue_style( 'parent-style', get_template_directory_uri() . '/style.css' );
    wp_enqueue_style( 'child-style', get_stylesheet_uri(), array('parent-style')  );
}
// Set priority higher than 10 so that the child stylesheet is loaded last
add_action( 'wp_enqueue_scripts', 'enqueue_child_theme_styles', PHP_INT_MAX);
?>
Go into WordPress admin and activate the new child theme
Reload the page. Open the page’s source. Verify that the child theme is loaded last. For example:
<link rel='stylesheet' id='open-sans-css' href='https://fonts.googleapis.com/css?family=Open+Sans%3A300italic%2C400italic%2C600italic%2C300%2C400%2C600&subset=latin%2Clatin-ext&ver=4.4.1' type='text/css' media='all' /> <link rel='stylesheet' id='dashicons-css' href='http://mysite.com/wp-includes/css/dashicons.min.css?ver=4.4.1' type='text/css' media='all' /> <link rel='stylesheet' id='admin-bar-css' href='http://mysite.com/wp-includes/css/admin-bar.min.css?ver=4.4.1' type='text/css' media='all' /> <link rel='stylesheet' id='woocommerce-layout-css' href='//mysite.com/wp-content/plugins/woocommerce/assets/css/woocommerce-layout.css?ver=2.3.13' type='text/css' media='all' /> <link rel='stylesheet' id='woocommerce-smallscreen-css' href='//mysite.com/wp-content/plugins/woocommerce/assets/css/woocommerce-smallscreen.css?ver=2.3.13' type='text/css' media='only screen and (max-width: 768px)' /> <link rel='stylesheet' id='woocommerce-general-css' href='//mysite.com/wp-content/plugins/woocommerce/assets/css/woocommerce.css?ver=2.3.13' type='text/css' media='all' /> <link rel='stylesheet' id='brawny-fontawesome-css' href='http://mysite.com/wp-content/themes/brawny/css/font-awesome.min.css?ver=4.4.1' type='text/css' media='all' /> <link rel='stylesheet' id='brawny-oswald-css' href='//fonts.googleapis.com/css?family=Oswald%3A400%2C700&ver=4.4.1' type='text/css' media='all' /> <link rel='stylesheet' id='brawny-flexslider-css' href='http://mysite.com/wp-content/themes/brawny/css/flexslider.css?ver=4.4.1' type='text/css' media='all' /> <link rel='stylesheet' id='brawny-style-css' href='http://mysite.com/wp-content/themes/brawny-child/style.css?ver=4.4.1' type='text/css' media='all' /> <link rel='stylesheet' id='brawny-blue-css' href='http://mysite.com/wp-content/themes/brawny/css/default.css?ver=4.4.1' type='text/css' media='all' /> <link rel='stylesheet' id='parent-style-css' href='http://mysite.com/wp-content/themes/brawny/style.css?ver=4.4.1' type='text/css' media='all' /> <link rel='stylesheet' id='child-style-css' href='http://mysite.com/wp-content/themes/brawny-child/style.css?ver=4.4.1' type='text/css' media='all' />
The child stylesheet is the last in the list, meaning that its contents will take priority over the other stylesheets.
Any changes you make to style.css in the child theme’s directory will override style.css in the parent directory.
If you need to customize any of the parent’s PHP template files, make a copy of them in the child directory (following the same directory structure as the parent) and make your changes there. The template files in the child directory will override those in the parent’s directory. The only exception to this is the functions.php file.
Manually Copy Changes
- Download current theme folder (including customizations) using an FTP client
- Download the new theme version from the web
- If you know where the customizations are, copy and paste the old theme’s code snippets to new theme
- If you don’t know where they are, use a utility (e.g: WinMerge) to compare the files.
- Copy and paste the custom code snippets into the new theme.
- Upload new theme directory to WordPress theme folder.
Comparing the files
Now, in the event that you’ve inherited a WordPress site, in which the theme was customized by someone else, we need to find out exactly what customizations were made to the theme’s files.
Unfortunately, sometimes only the latest version is available for download on the theme’s website. To get an older version, you can use SVN or Subversion.
Look at the bottom-right corner of the theme’s page for “Browse the Code” -> “Subversion Repository
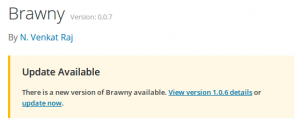
From the WordPress dashboard, go to appearances -> themes and find out what version of the theme is installed.
Click on “Theme Details”. A window should pop up that includes the version of the theme. For example:
Create a new directory under themes (brawny_original). Open a terminal from that window.
Using SVN, download the version of the theme which is currently installed.
svn export https://themes.svn.wordpress.org/brawny/0.0.7/
This will create a directory called 0.0.7 (depending on the version number you found), with the theme’s original files inside.
We need to compare this directory to the existing theme’s directory, to find out which files have been modified. For this, we’ll use a Linux application called Meld.
Open Meld and click on “Directory comparison” button.
References
http://www.wpbeginner.com/wp-themes/how-to-update-a-wordpress-theme-without-losing-customization/
http://www.wpbeginner.com/wp-themes/how-to-create-a-wordpress-child-theme-video/
https://codex.wordpress.org/Child_Themes
http://mor10.com/challenges-new-method-inheriting-parent-styles-wordpress-child-themes/
http://www.childthemeconfigurator.com/how-child-themes-work/
https://wordpress.org/support/topic/woocommercecss-overriding-child-theme-stylecss
Pingback: Move Some WordPress Sidebar Widgets Above Content in Responsive Mode |