Do you have a sidebar that contains essential widgets that your visitors must see when they visit your site from a mobile device? Perhaps a search box, product categories, an advertisement, or something else?
A lot of WordPress themes display the sidebar below the content on mobile devices, so visitors have to scroll all the way to the bottom to see them. There are many tutorials that explain how to move the sidebar above the content, but maybe you only want to move one or two of the most critical widgets to the top. This post will explain how to do that!
Contents
Create a Child Theme
We are going to make changes to the theme’s PHP scripts and CSS stylesheets. You don’t want the changes to be wiped out next time you install a theme update, so create a child theme if you haven’t done so already. The child theme’s directory will contain a copy of the PHP files we change, and those files will contain the customizations we make.
Register a New Sidebar
The next step is to register a new sidebar with WordPress. This sidebar will be displayed above the content on mobile devices, and you will be able to insert just the widgets you want your visitors to see.
Below is an example of what the code to register a sidebar looks like. If you want the sidebar to look the same as your current one, then find this code in the parent theme’s functions.php and copy and paste it into the functions.php file of your child theme. Change the name, id, and description.
// Add a sidebar above the content
function above_content_sidebar() {
    register_sidebar(
        array (
            'name' => __( 'Top Sidebar'),
            'id' => 'top-sidebar',
            'description' => __( 'Contains widgets that appear before the content in mobile mode' ),
            'before_widget' => '<aside id="%1$s" class="widget %2$s">',
            'after_widget' => "</aside>",
            'before_title' => '<p class="widget-title">',
            'after_title' => '</p>',
        )
    );
}
add_action( 'widgets_init', 'above_content_sidebar' );
In this code we declare a new function called above_content_sidebar() in which we pass an array to the register_sidebar() function. In the last line, we call the add_action() function to include the sidebar in widgets_init.
Note the id of the sidebar (in this case ‘top-sidebar’) because you will use it in the following steps.
Create a New Sidebar File
In this step, we will create a new sidebar PHP file in the child theme’s directory. We will make calls to it later when we modify more of the theme’s files.
Copy and paste the sidebar.php file from the theme’s parent directory into the child directory. Rename it so that it begins with “sidebar-” and then give it a unique name. “sidebar-top.php”, for example. The file must begin with “sidebar-” due to the way it is called with the get_sidebar() function. This will be demonstrated later.
In the code itself, replace the name of the sidebar with the id you created in the previous step. For example, the new name in the code below is ‘top-sidebar’. Also, consider adding a new CSS class to the DIV tag containing the sidebar, so that you can assign it unique display rules (ie: to remain visible in mobile mode). In this example I added the class ‘widget-area-top’ to the ‘topsidebar’ DIV. We will write CSS for this class in the last step.
	<?php if ( is_active_sidebar( 'top-sidebar' ) ) : ?>
		<div id="topsidebar" class="widget-area widget-area-top" role="complementary">
			<?php dynamic_sidebar( 'top-sidebar' ); ?>
		</div><!-- #secondary -->
	<?php else : ?>
	 		<div id="topsidebar" class="widget-area widget-area-top" role="complementary">
			<div class="widget widget_search">
				<?php get_search_form(); ?>
			</div>
			<div class="widget widget_recent_entries">
				<p class="widget-title"><?php _e( 'Recent Posts', 'iconic-one' ); ?></p>
				<ul><?php wp_get_archives('type=postbypost&limit=5'); ?></ul>
			</div>
			<div class="widget widget_pages">
			<p class="widget-title"><?php _e( 'Pages', 'iconic-one' ); ?></p>
          <ul><?php wp_list_pages('title_li='); ?></ul>
      </div>

	  <div class="widget widget_tag_cloud">
       <p class="widget-title"><?php _e( 'Tag Cloud', 'iconic-one' ); ?></p>
        <?php wp_tag_cloud('smallest=10&largest=20&number=30&unit=px&format=flat&orderby=name'); ?>
			</div>
		</div><!-- #secondary -->
	<?php endif; ?>
Add Widgets to the Sidebar
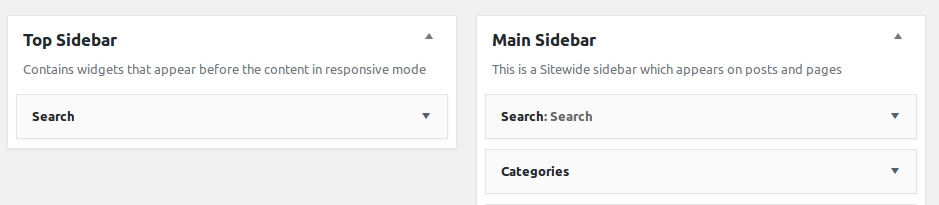
Now the new sidebar should be visible from the WordPress Administration panel. Navigate to “Widgets” under “Appearance” and you should see the new sidebar there. Add the widgets that you want your visitors to see.
Display the New Sidebar
To actually display the new sidebar on your website, you need to call the get_sidebar() function from within your theme files. Without any arguments, the get_sidebar() function loads the default sidebar. If you want to display a specific sidebar, then you must pass its name to the function. For example, get_sidebar(‘top’).
The sidebar’s name is the name of the file we created earlier, minus the “sidebar-” portion. This is the naming convention WordPress uses to identify sidebar files.
Remember to copy any PHP scripts you will change to the child theme’s directory and modify them there.
Here’s an example of calling the new sidebar from page.php. We want this sidebar to appear above the content, so the get_sidebar() function is called before the posts’ while loop. The original sidebar remains visible at the bottom.
get_header(); ?>
<?php get_sidebar('top'); // <- Load the top sidebar ?>

	<div id="primary" class="site-content">
		<div id="content" role="main">

			<?php while ( have_posts() ) : the_post(); ?>
				<?php get_template_part( 'content', 'page' ); ?>
				<?php comments_template( '', true ); ?>
			<?php endwhile; // end of the loop. ?>

		</div><!-- #content -->
	</div><!-- #primary -->

<?php get_sidebar(); // <- Load the original sidebar ?>
<?php get_footer(); ?>
Add get_sidebar(‘sidebarname’) to any other theme files you want it to be visible in (For example: index.php, page.php, single.php, search.php, category.php, etc.)
You should now be able to see the new sidebar as you navigate through your WordPress site. The last step is to make the sidebar responsive so that it is hidden unless it is being viewed from a mobile device.
Make it Responsive
We will now edit the CSS stylesheet in your child theme’s directory to make the new sidebar responsive to mobile devices.
The changes below keep the sidebar hidden until resolution passes 768 pixels. Make sure that the CSS class (in this case, ‘widget-area-top’) matches the class name you assigned to the sidebar’s DIV.
/* Minimum width of 768pixels. */
@media screen and (min-width: 768px) {
	.widget-area-top {
		display: none;
	}
}
Refresh the page and the sidebar should disappear. However, the sidebar should be visible from a mobile device.
If you are having any difficulties, feel free to leave a comment below or contact me for assistance.
References
http://themegrill.com/support-forum/topic/widget-above-content/
https://www.tastyplacement.com/add-sidebar-wordpress
https://themify.me/docs/second-sidebar
https://www.ostraining.com/blog/wordpress/custom-sidebar/
I have gone through this tutorial 4 times and still cannot get the widget to appear. Help!
Pingback: Create Theme Template / Plugins – Guru site