In this post, you will learn how to setup a brand new hard drive in Linux Mint. This involves creating a new partition table and then dividing the disk into partitions. You can use the GParted application to do this.
After you’ve physically installed the drve, reboot Linux Mint and launch GParted from the Mint menu.

If you can’t find gparted in the menu, you can install it with the following command:
sudo apt-get install gparted
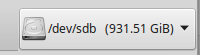
After GParted launches, make sure the new hard drive is selected at the top right corner of the window:
If you’re unsure which device name is the new drive, you can use the fdisk command to list the physical drives and their properties.
sudo fdisk -l
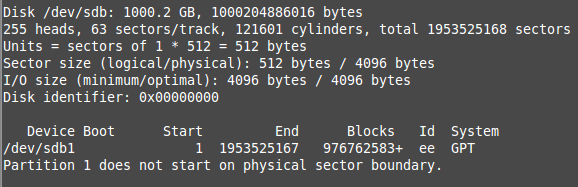
Output from the fdisk -l command
You can find the new hard drive’s device name by looking for a matching size in the output. For example, if the new drive is 1TB and you see in the output that the size of /dev/sdb is 1000GB (1TB), then /dev/sdb is probably your new drive. If you have other drives of the same size, look for the one that doesn’t have any existing partitions. Be sure to select the correct drive as overwriting the partition table of your active drive will result in a non-bootable drive and possible data loss.
Once you’re sure you’ve got the right device selected, select Device -> Create Partition Table from the menu bar. A list of partition table types will appear:
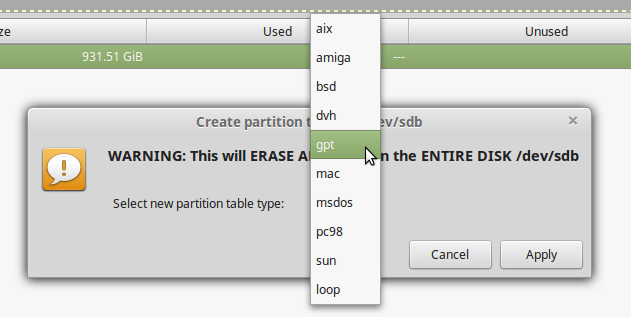
The two most common types are:
- msdos (MBR – Master Boot Record) This is an older partition type. Choose this format for compatibility with older operating systems such as Windows XP
- gpt (GUID Partition Table) Choose this one for the following benefits:
- Support for larger disks (MBR supports 2TB max)
- No limited or confusing “primary/extended/logical” partition distinctions
- Supported by modern operating systems
- Redundancy. Writes partition table both and the beginning and end of the disk
Select your desired format and then click on Apply.
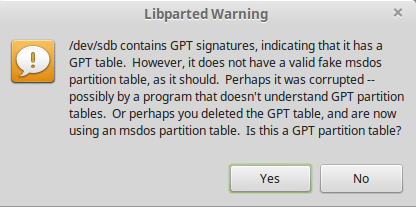
If you see the following error:
“/dev/sdbx containts GPT signatures, indicating that it has a GPT table. However, it does not have a valid fake msdos partition table…”
Read this Ubuntu answer.
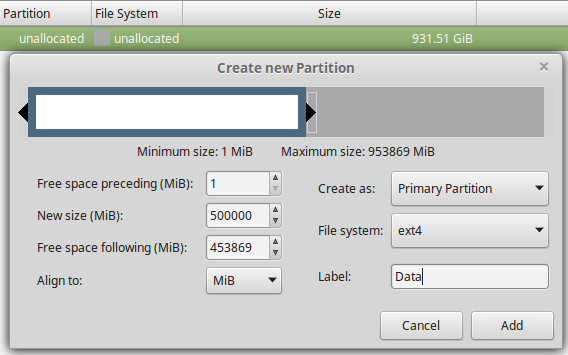
Right-click on the drive’s unallocated space and select “New”
Input the selected size of partition, file system type, label and click the “Add” button
Before exiting the application you need to apply the changes you made. Click on Edit -> Apply all operations.
To enable auto-mount of the drive upon system startup, add a customized version of the following to the /etc/fstab configuration file.
# Data drive
/dev/sdb1 /home/username/data ext4 defaults, 0 2